
How to Blind Bake a Pie Crust
Say goodbye to the dreaded soggy bottom. Learn how and when to blind bake your pastry for perfectly crisp, golden pie crusts.
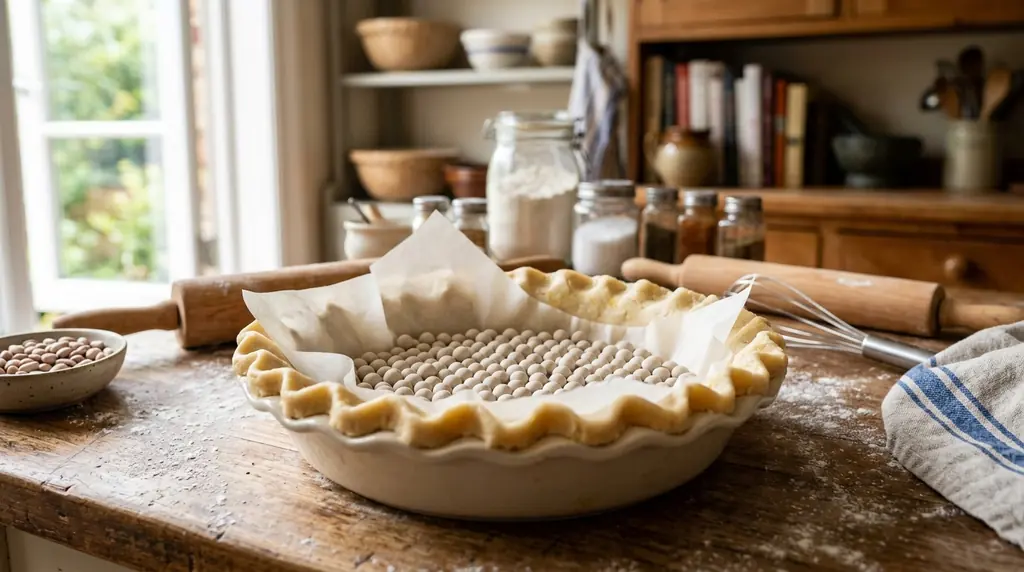
The Curse of the Soggy Bottom
There are few things more disappointing in baking than slicing into a beautiful, labor-intensive fruit or custard pie, only to discover that the bottom crust is a gummy, undercooked, soggy paste. This happens because the wet filling insulates the dough, preventing the heat of the oven from reaching the pastry and cooking it properly.
The solution is a foundational pastry technique known as "blind baking." This simply means partially or fully baking the pie crust in the oven without any filling in it, ensuring that the bottom is crisp, set, and capable of holding moisture.
When is Blind Baking Necessary?
You do not need to blind bake every pie, but certain recipes absolutely demand it.
- Custard Pies (Pumpkin, Pecan, Lemon Meringue): These fillings are essentially liquids when they go into the oven. If poured into a raw crust, the liquid will seep into the dough instantly. A fully baked blind crust creates a waterproof barrier.
- Cream Pies (Chocolate Silk, Banana Cream): These fillings are cooked entirely on the stovetop and poured into a cooled crust. The crust must be 100% fully baked and cooled before the filling is added.
- Wet Fruit Pies: If you are making a heavily macerated strawberry or peach pie, partially blind-baking the bottom crust gives it a fighting chance to stay crisp.
Step-by-Step Blind Baking Technique
The danger of baking an empty crust is that the fat melts before the structure sets, causing the dough to shrink rapidly down the sides of the pan or puff up like a balloon in the center. We counter this with weights and chilling.
- Step 1: Roll out your dough, fit it perfectly into your pie dish, and crimp the edges. Now, put the entire dish into the freezer for at least 30 minutes. The butter must be rock hard before it hits the oven to prevent shrinking.
- Step 2: Preheat your oven to a high temperature, usually 400°F (200°C).
- Step 3: Remove the frozen crust from the freezer. Cut a large square of parchment paper or aluminum foil (crumpling the parchment paper into a ball and flattening it out makes it easier to fit into the dish).
- Step 4: Press the parchment firmly against the bottom and sides of the frozen dough.
- Step 5: Fill the parchment right up to the brim with pie weights. You can buy ceramic baking weights, but dried beans, uncooked rice, or white sugar work perfectly. The heavy weights physically hold the dough in place, preventing the sides from slumping and the bottom from puffing.
- Step 6: Bake the weighted crust for 15 to 20 minutes. The edges should look set and pale golden.
- Step 7: Remove the pie dish from the oven. Carefully grab the corners of the parchment paper and lift out all the hot weights (save the rice/beans in a jar for future blind baking; do not eat them).
- Step 8: Use a fork to prick a few small holes in the bottom of the crust (docking). Return the naked crust to the oven for another 5 to 10 minutes until the bottom is dry and golden brown.
- Step 9: For an extra layer of protection, brush the hot bottom crust with a lightly beaten egg white as soon as it comes out of the oven. The residual heat will cook the egg, sealing the crust with a waterproof protein barrier.
Patience Yields Perfection
Blind baking is an extra step that adds an hour to your baking time, mostly due to the chilling process.
- Do not rush the freezing step. If the butter is soft, your beautiful crimped edges will melt into a puddle in the oven.
- Ensure the pie weights go all the way up the sides of the dish to support the walls.
Taking the time to properly blind bake guarantees a structurally sound, delightfully flaky pie that slices perfectly and holds its shape on the plate.