
How to Make a Perfect Pie Crust
The secret to a shatteringly flaky, tender pie crust is temperature control. Learn the professional techniques for cutting in butter and handling pastry dough.
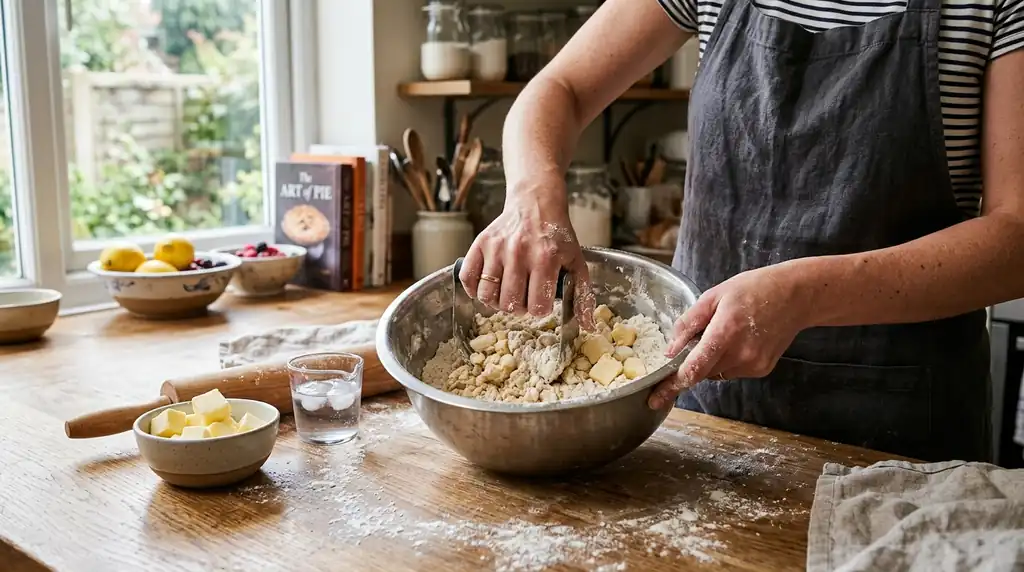
The Physics of Flakiness
A great pie crust is a mechanical marvel. It should be tender enough to yield to a fork, yet sturdy enough to hold a heavy fruit filling, and it must shatter into dozens of microscopic, buttery flakes when bitten.
This flakiness is achieved through a process called mechanical leavening. When you mix pie dough, the goal is NOT to create a smooth, uniform paste. Instead, you want to leave distinct, visible chunks of cold butter suspended in the flour. When this dough goes into a hot oven, the water inside those butter chunks rapidly turns to steam. The expanding steam pushes the layers of flour apart, creating the delicate, flaky pockets.
The Golden Rule: Keep It Cold
The absolute enemy of a flaky pie crust is heat. If your butter gets too warm, it will melt into the flour before it hits the oven, resulting in a dense, tough, greasy crust.
- Everything must be ice cold. Cut your butter into cubes and put it back in the freezer for 15 minutes before mixing.
- Measure your water, add ice cubes to it, and let it sit for 5 minutes so it is painfully cold.
- If your kitchen is sweltering in the middle of summer, chill your mixing bowl and your flour in the fridge before starting.
Step-by-Step Pastry Technique
This classic method, known as the "fraisage" technique, ensures tenderness while preventing over-mixing.
- Step 1: Combine your dry ingredients (flour, salt, and a pinch of sugar) in a large metal or glass bowl. Avoid plastic bowls, as they retain heat.
- Step 2: Add the frozen butter cubes. Toss them in the flour so they are fully coated.
- Step 3: Cut in the butter. Using a pastry blender or your fingertips, begin smashing the butter cubes into the flour. Work quickly. You want a mixture that resembles coarse meal, but you MUST leave some pieces of butter the size of peas or large almonds intact. Do not turn it into sand.
- Step 4: Hydrate the dough. Sprinkle 2 tablespoons of your ice water (do not let the ice cubes fall in) over the mixture. Use a silicone spatula to gently fold and toss the mixture. It will still look very dry.
- Step 5: Add more water, 1 tablespoon at a time, tossing gently, just until the dough holds together when you squeeze a handful of it tightly. If it is wet and sticky, you have added too much water.
- Step 6: The Fraisage. Turn the shaggy, crumbly dough out onto a counter. Use the heel of your hand to push a small section of the dough firmly down and away from you against the counter, smearing the butter chunks into long, flat streaks. Repeat this across the pile of dough just once or twice.
- Step 7: Gather the dough into a tight disc. Wrap it tightly in plastic wrap.
- Step 8: The Mandatory Rest. Place the wrapped disc in the refrigerator for at least 1 hour (or overnight). This allows the gluten to relax and gives the flour time to fully hydrate, preventing the crust from shrinking in the oven.
Rolling and Baking
When rolling out the dough, work quickly to keep it cold.
- Dust your counter and rolling pin lightly with flour. Roll from the center outward, giving the dough a quarter turn after every roll to ensure it isn't sticking.
- If the dough begins to feel soft, greasy, or warm, stop immediately. Put it on a baking sheet and return it to the fridge for 10 minutes before continuing.
- Always bake pie crusts at a high initial temperature (400°F - 425°F) for the first 15 minutes to quickly generate the steam needed for flakiness, then reduce the heat to finish cooking the filling.
Mastering temperature control and learning to leave large chunks of butter intact will elevate your pies from acceptable to exceptional.