
How to Properly Whisk and Emulsify
Whisking is not just stirring vigorously. Learn the biomechanics of the whisk and the science of emulsification to create stable mayonnaise, hollandaise, and dressings.
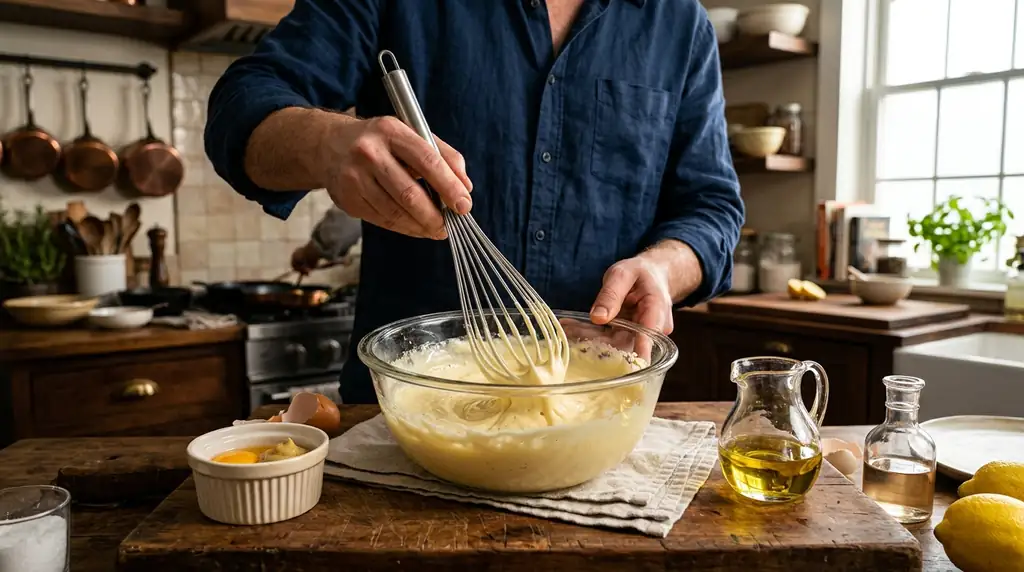
The Biomechanics of Whisking
To the amateur cook, a whisk is just a tool for stirring pancake batter rapidly. In reality, the whisk is an aeration and emulsification engine. Its purpose is to physically smash ingredients together with such force that they bind at a microscopic level, or to whip air into a liquid until it forms a foam.
The most common mistake home cooks make is whisking from the elbow or the shoulder, creating a stirring motion. This is incredibly inefficient, causes rapid fatigue, and fails to generate the necessary shear force. Proper whisking is driven entirely by the wrist.
The Right Whisk for the Job
You cannot execute proper technique with the wrong equipment.
- Balloon Whisk: Large, bulbous, with flexible tines. Used for whipping air into egg whites or heavy cream.
- French Whisk: Narrow, elongated, with stiff tines. Designed for reaching the corners of a saucepan and forcefully emulsifying heavy sauces like hollandaise or gravy.
- The Grip: Do not hold the whisk like a baseball bat. Hold it like a pencil, gripping the handle between your thumb and index finger, letting the handle rest lightly against your palm. This unlocks your wrist.
Step-by-Step Emulsification (Making Mayonnaise)
Emulsification is the process of forcing two incompatible liquids (like oil and water) to bind together into a thick, creamy sauce. We will use a classic homemade mayonnaise to demonstrate the technique.
- Step 1: Anchor the bowl. You need both hands for this process. Wet a kitchen towel, twist it into a rope, and form it into a circle on your counter. Set your mixing bowl into the circle. This prevents the bowl from spinning while you whisk.
- Step 2: Add the base. Place 1 large egg yolk, 1 tablespoon of lemon juice (or vinegar), a pinch of salt, and 1 teaspoon of Dijon mustard into the bowl. The yolk and the mustard contain lecithin, the chemical compound that stabilizes the emulsion.
- Step 3: The Motion. Using your pencil grip, begin whisking the base vigorously. The motion is not a circle; it is a rapid side-to-side (left to right) slashing motion across the bowl. This creates maximum shear force, slamming the ingredients against the tines of the whisk.
- Step 4: The Drizzle. While slashing back and forth constantly, use your non-dominant hand to pour a neutral oil (like canola or grapeseed) into the bowl. Start drop by literal drop. If you pour too fast, the sauce will "break" (separate into a greasy mess).
- Step 5: Establish the emulsion. Once you have incorporated about 2 tablespoons of oil drop-by-drop, you will notice the mixture suddenly turn pale, opaque, and noticeably thicker. Congratulations, you have established the emulsion.
- Step 6: The Steady Stream. Once the emulsion is established, you can pour the remaining oil (about 1 cup total) in a very slow, thin, steady stream, whisking constantly until the mayonnaise is thick and luscious.
How to Fix a Broken Emulsion
If you poured the oil too fast or didn't whisk aggressively enough, your sauce will break into a curdled, greasy soup. Do not throw it away.
- To fix it, grab a fresh, clean bowl. Place 1 tablespoon of hot water (or a fresh egg yolk) into the new bowl.
- Begin whisking the hot water vigorously.
- Slowly, drop by drop, drizzle the broken, greasy sauce into the hot water while whisking constantly. The new base will re-emulsify the broken sauce, bringing it back to life.
Mastering the side-to-side whisking motion and understanding the slow drizzle of emulsification gives you the power to create the richest, most luxurious sauces in classical cuisine entirely by hand.