
Understanding Direct vs. Indirect Heat in Grilling
Stop burning your chicken on the outside while leaving it raw in the middle. Master the two-zone fire to gain absolute control over your barbecue grill.
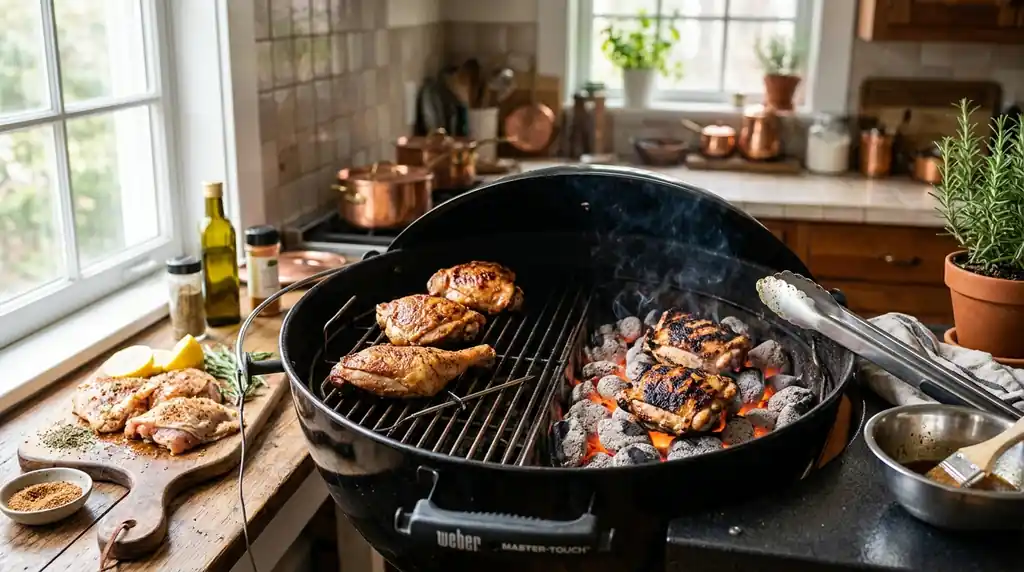
The Backyard Barbecue Mistake
The most common mistake amateur grillers make is treating their barbecue like an inferno. They turn every burner on the gas grill to high, or spread an even layer of blazing hot charcoal across the entire bottom of a kettle grill, creating a uniform wall of intense, uncompromising heat.
While this setup is fine for cooking thin, quick-cooking items like hot dogs or thin burgers, it is an absolute disaster for thick cuts of meat like chicken thighs, pork chops, or large steaks. The intense heat incinerates the exterior of the meat into a bitter, charred crust long before the internal temperature reaches a safe level.
The Solution: The Two-Zone Fire
Professional pitmasters and chefs solve this problem by establishing a "two-zone fire." This technique divides the grill into two distinct temperature zones, giving you total control over the cooking process.
- Zone 1: Direct Heat. This is the intensely hot area where the food sits directly above the flames or glowing coals. It is used exclusively for searing, creating a crust, and triggering the Maillard reaction. Temperatures here exceed 500°F.
- Zone 2: Indirect Heat. This is the cooler area of the grill with no heat source directly underneath it. The food cooks via ambient, convective heat bouncing off the lid of the grill. It essentially turns your barbecue into a gentle, wood-fired oven. Temperatures here hover around 250°F to 350°F.
Step-by-Step: Setting Up and Using the Zones
Setting up a two-zone fire is incredibly simple, whether you are using gas or charcoal.
- Step 1 (Gas Grill): Turn the burners on the left side of the grill to high. Leave the burners on the right side completely off. Close the lid and let the ambient temperature rise.
- Step 2 (Charcoal Grill): Light your charcoal in a chimney starter. Once the coals are covered in white ash, pour them all onto one side of the grill grate, banking them into a steep pile. Leave the other half of the grill completely empty.
- Step 3 (The Reverse Sear): For thick steaks or pork chops, start them on the Indirect side. Close the lid. Let them roast gently until the internal temperature is about 15 degrees below your target doneness.
- Step 4: Once the meat is gently cooked through, move it directly over the blazing hot coals (the Direct side) for 1 to 2 minutes per side to develop a deep, caramelized crust without overcooking the center.
- Step 5 (The Traditional Method): For chicken pieces, start them on the Direct side to crisp the skin. Once browned, move them to the Indirect side, close the lid, and let them finish cooking gently all the way through without burning the skin.
- Step 6 (Flare-up Management): If fat drips from a burger and causes a massive flare-up of flames on the Direct side, simply slide the burger over to the Indirect side until the flames die down. The safe zone is always there to rescue your food.
Mastering the Vents (Charcoal Only)
If you are using a charcoal kettle grill, you must understand how to control the airflow to manage the temperature of the indirect zone.
- Fire needs oxygen to survive. The wider you open the bottom and top vents, the more air rushes in, and the hotter the fire will burn.
- To lower the ambient temperature, close the vents down so they are only slightly open, starving the fire of oxygen and creating a low-and-slow smoking environment.
- Always position the top vent directly over the food on the indirect side. This draws the hot smoke from the coals across the food before exiting the grill.
By utilizing a two-zone fire, you are no longer at the mercy of the flames. You dictate exactly how and when the food cooks, guaranteeing juicy, perfectly cooked barbecue every single time.